

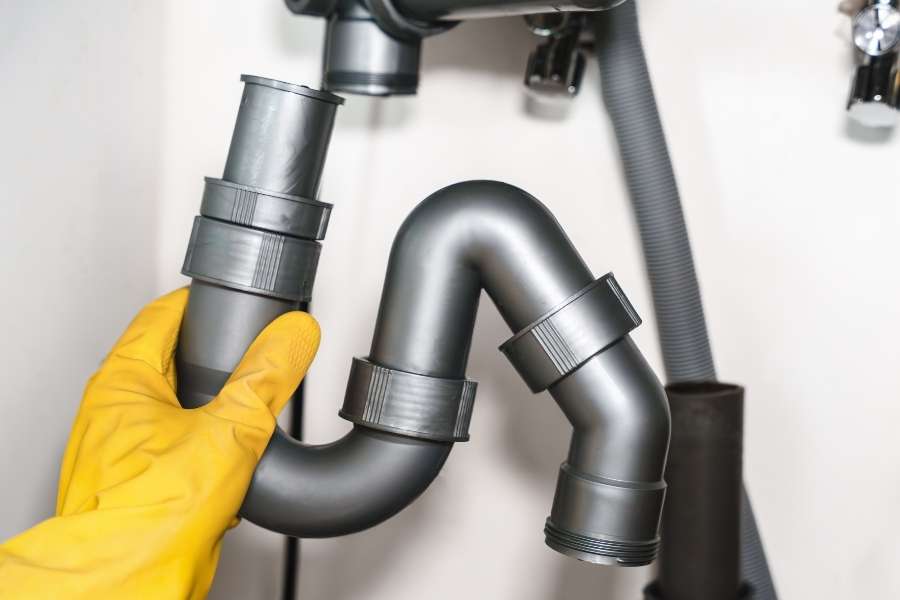
That musty smell under your vanity is not your imagination. A dripping bathroom sink trap can quietly rot your cabinet wood overnight. You do not need an expensive plumber to solve this problem today. Anyone can fix this common issue with basic tools and steady hands.
Plumbing under your counter works by gravity alone. There is zero high pressure waiting to burst into your face. We will walk through every step together right now. You will gain genuine confidence while keeping your home dry and safe.
Understanding Your Home Drainage Layout
Before grabbing your pliers, look closely at how the pipes connect. The curved pipe creates a liquid seal inside your vanity cabinet. That standing puddle keeps toxic sewer gases inside the main stack. Without it, foul odors will enter your bathroom every single hour. Just as planning cabinet joinery demands precision, mastering these custom bookcase building tips helps you understand how structural alignment prevents costly household damage.
The plumbing code requires this specific water barrier on every drain line. Your bathroom basin empties directly down through the vertical drop piece. Water moves around the bend and exits through the horizontal wall pipe. Understanding this path helps you spot trouble spots immediately during repairs.
The Science Behind the Liquid Barrier
The curve traps a small pool of clean rinse water continuously. This liquid creates an airtight wall against rising sewer fumes. Sewer air carries dangerous gases like hydrogen sulfide into homes. Running the faucet occasionally keeps that protective water plug full and working.
Modern P-Bends Versus Obsolete S-Runs
Older buildings often feature pipes that plunge straight through the floor. Plumbing inspectors ban these outdated S-runs because they siphon themselves dry. The sudden rush of draining water empties the entire bend. Installing a proper horizontal wall exit keeps the water barrier fully intact.
Essential Gear and Smart Workspace Setup
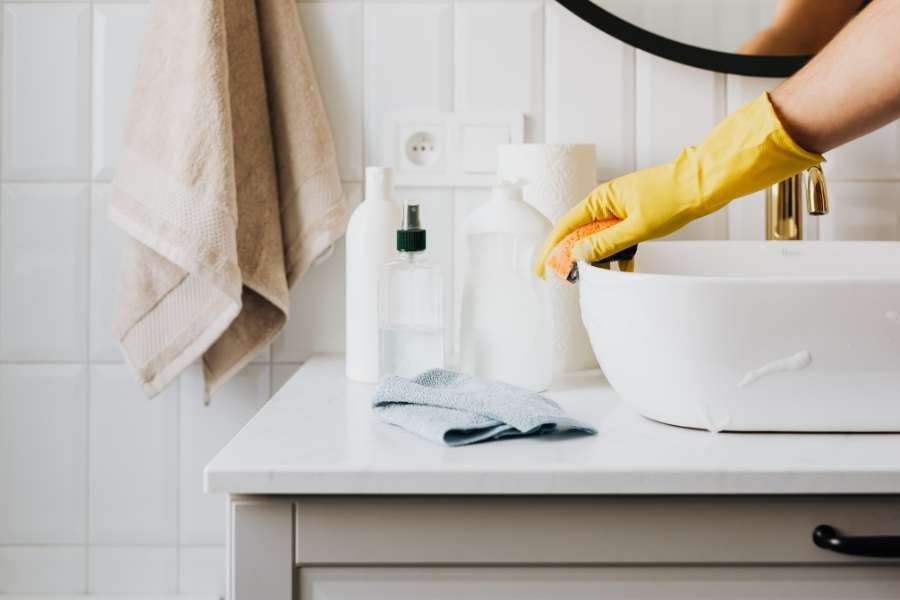
Working on your back in a tight space requires proper preparation. Clear every soap bottle and spare washcloth out of the cabinet first. Spread a thick towel over the bottom board to absorb spills. Knowing what tools do you really need to start your first diy home project ensures you never pause mid-repair to search for missing equipment. Good lighting makes it easy to line up every single thread.
A battery work light helps you see inside the dark recess. Put on safety glasses before you stick your head beneath the drain. Decades of soapy sediment and grime can easily splash into your eyes. Taking five minutes to get organized saves you endless frustration later.
Make sure you have these parts ready on your floor:
- Standard white pvc tubular drain kit
- Smooth-jaw plumbing pliers or an adjustable wrench
- New beveled slip gasket assortment
- Small plastic bucket or dish pan
- Stiff nylon cleaning brush
- Microfiber shop rags for quick wipe downs
How to Disassemble and Clean the Old Pipes
Now we can disassemble and clean the trap safely. Position your plastic bucket squarely beneath the lowest point of the bend. Take your time and inspect every single plastic or brass nut. Older parts may resist turning, so hold the upper pipe firmly.
Never jerk the tool violently against old metal or brittle plastic. Supporting the upper pipe prevents strain on the bottom of the sink. Most modern tubular systems come apart with light hand pressure alone. Let us begin taking the dirty pieces apart right now.
Loosening Slip Nuts and Catching Dirty Water
Grip the lower plastic nut with your hands or open pliers. Turn the nut counterclockwise until the threads release from the joint. Wastewater and tangled hair will dump straight into your plastic bucket. Let the water drain out before touching the rear wall nut.
Loosen the rear nut that secures the arm to your wall. Pull the horizontal tube straight out of the wall drain adapter. Empty the remaining sludge directly into your catch bucket below. Wipe down the metal sink threads with a clean cotton rag.
Inspecting the Wall Pipe for Blockages
Take a bright light and shine it into the open wall. Clear out any sticky soap slime using a stiff bottle brush. Wipe the exterior pipe threads so the fresh fittings screw on easily. Clean threads ensure a tight seal without crossing any plastic joints.
Check the pipe coming down from the sink for cracks or corrosion. If the metal threads show deep rust, replace that section too. Putting new plastic over rotten metal will cause leaks later on. Smooth, clean pipe ends help the rubber seal seat completely flat.
Picking the Best Replacement Parts at the Store
Tubular drain kits come in two common residential sizes at hardware stores. Bathroom sinks universally run on 1-1/4 inch diameter drain pipes. Kitchens use thicker 1-1/2 inch pipes to carry heavier food waste away. Measure your sink pipe before buying replacement parts at the shop.
Modern tubular plastic is rustproof, highly durable, and very affordable for homeowners. It flexes slightly during install, which helps you fit tight vanity spaces easily. Smooth interior walls stop hair clogs from catching on rough inner edges. A standard kit contains the bend, wall arm, and slip washers.
Tubular plastic provides complete rust immunity and lasts thirty years with zero upkeep. Schedule 40 plastic lasts fifty years but requires messy chemical solvent welding. Polished brass looks sharp initially but often develops pinhole corrosion within fifteen years. Cast iron remains completely obsolete due to heavy rust formation and difficult maintenance.
Assembling Your New PVC Trap Correctly
Now you can assemble a pvc trap the right way. Lay out your new pieces on the floor to check fit. Look at the small plastic washers included in your retail bag. The shape of that washer determines whether your sink stays dry.
The angled edge must face directly toward the receiving pipe mouth. When the nut tightens, it wedges that washer into the socket. That wedge creates the physical barrier against leaking water under pressure. Take your time to align every washer in the proper direction.
Slide a nut onto the vertical sink drop pipe pointing down. Push the beveled washer on next with the narrow end down. Insert the horizontal wall arm into the wall pipe adapter loosely. Hang the curved body between the drop pipe and the arm.
Adjust the depth of the pipes until they align naturally together. Never force two crooked pipes together by overtightening the nut. Misaligned parts pinch the rubber washer and cause immediate leaks later. Everything should line up straight before you spin a single thread.
Hand-tighten every nut until it seats firmly against the plastic shoulder. Keep the connection straight while you turn each nut down clockwise. Once hand-tight, add a slight quarter-turn using your adjustable tool. That final turn sets the sealing ring firmly without cracking parts.
Testing Your Drain Under Heavy Water Flow
Testing is the most important part of any plumbing project. A slow trickle will rarely show you where weak spots hide. You must push full water volume through your new drainage line. That test proves whether your home is safe from water damage.
Wipe every pipe bone-dry with a fresh paper towel first. Completely dry plastic makes the tiniest water drop show up instantly. Close your sink stopper and turn the faucet on full blast. Fill the sink basin all the way up to its rim.
Pull the plug so water dumps down the pipe at once. Watch every threaded joint beneath the cabinet with your work light. Run your fingers over the bottom seams to feel for moisture. A completely dry paper towel means your installation was a success.
If you spot a drip, do not panic or force things. Overtightening will warp the soft washer and make leaks worse fast. Back the nut off, straighten the pipe, and retighten it slowly. Most small leaks disappear once you reset the internal washer squarely.
Long-Term Sink Care to Prevent Drain Problems
Now you know how to replace a bathroom sink trap cleanly. A few basic maintenance habits keep your vanity cabinet dry forever. Never dump harsh chemical drain cleaners down your bathroom sink lines. Caustic chemicals generate intense heat that ruins plastic slip washers fast.
Use a simple plastic zip tool to pull out hair clogs. Enzymatic cleaners digest soap scum safely without hurting your plumbing joints. Wipe down your cabinet every few months and check for damp spots. Catching minor leaks early protects your vanity floor from expensive damage.
Taking care of small plumbing issues yourself saves serious household money. You learned how each pipe works and how washers create seals. Share your new plumbing confidence with a neighbor or handy friend. Enjoy your dry cabinet and your fresh, odor-free bathroom space.
Frequently Asked Questions
How tight should slip nuts be on a bathroom sink trap?
Tighten the slip nuts firmly using only your bare hands first. Add a quarter-turn with pliers to set the washer firmly. Avoid overtightening because too much force cracks modern plastic threads easily.
Which way does the slip washer face during assembly?
The tapered, narrow edge of the washer faces the pipe opening. And the flat face must always sit flush against the nut. The nut wedges the cone into the joint to stop leaks.
Should I use Teflon tape on these drain threads?
Never use Teflon tape or thread sealant paste on slip joints. The threads do not stop water on tubular drain pipe assemblies. The rubber washer inside creates the entire seal by physical compression.
